Blender Nitrox3d Non-Destructive Modeling Full Course Download
Blender Nitrox3d Non-Destructive Modeling Course Complete FREE Download
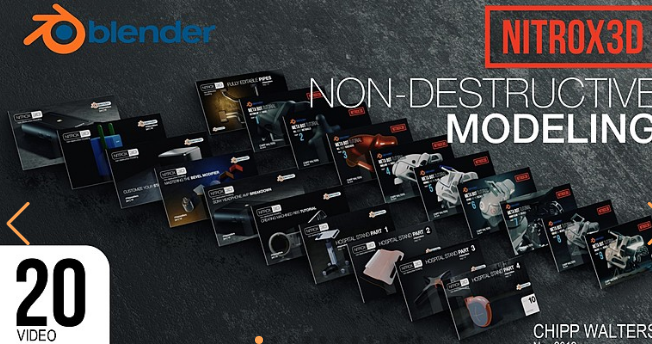
NITROX3D is not an addon, but rather a workflow that works with Blender’s existing modifiers.
The NITROX3D workflow (Non-destructive Iterative Techniques for Rapid Object eXploration in 3D.) enables you to quickly model in a parametric-like workflow, much like the expensive CAD systems, but without all the overhead and cost. While NITROX3D cannot model everything (a car, a character), it does work well for a surprisingly number of products and ArchViz models.
Includes 230+ minutes of compressed* training videos** PLUS all source files, textures and lighting rigs.
* Our videos are created to be as efficient as possible. Each video typically has over 100 edits to make sure you don’t waste any time learning!
** Both 1080p and 720p videos are available for download and streaming.
Curriculum
NITROX3D-01 (10 min) | INTRODUCTION
An Introduction to NITROX3D and why you may want to consider it for your next design project.
NITROX3D-02 (20 min) | ENCLOSURE BOX
The most basic explanation of how NITROX3D works.
NITROX3D-03 (20 min) | CUSTOMIZE YOUR STARTUP SCENE
Customizing your startup scene to take advantage of Blender 2.8 new features to help when using modifiers to build objects.
NITROX3D-04 (18 min) | MASTERING THE BEVEL MODIFIER
An explanation of many of the tricks you can use with Blender’s bevel modifier to create the shapes and objects which make up your non-destructive product. All source files included.
NITROX3D-05 (15 min) | SONY HEADPHONE AMP BREAKDOWN
A detailed walkthrough of the Sony headphone preamp model constructed entirely (including KIT OPS connectors) using the NITROX3D workflow.
NITROX3D-06 (12 min) | CREATING MACHINED RIBS TUTORIAL
This video goes over how to create a non-destructive rib pattern for die-cast, machined and injection molded parts.
NITROX3D-07 (7 min) | HOSPITAL STAND part 1
This video goes over the basic stand and dissects the parts which are the “low-hanging fruit” of object creation using modifiers.
NITROX3D-08 (12 min) | HOSPITAL STAND part 2
This video explains two different approaches to creating the curved stamped and punched metal tray top for the stand. It uses a variety of unique modifier approaches which are sure to get you thinking!
NITROX3D-09 (7 min) | HOSPITAL STAND part 3
A most unique approach on creating the base for the Hospital Stand. It uses the subdivision modifier plus a couple new wrinkles on how to quickly knock out a complex form with only a couple modifiers– while keeping it fully editable!
NITROX3D-10 (8 min) | HOSPITAL STAND part 4
How to create the casters and caster housing. This tutorial walks you through the most complex part of the model while sharing with you a number of new ways to think about your model.
NITROX3D-11 (17 min) | FULLY EDITABLE PIPES
Learn how to create pipes and cables you can edit at any time.
NITROX3D-12 (14 min) | SETTING UP THE MODEL
Introduction to Meta Element modeling and using KIT OPS to create the skeletal frame.
NITROX3D-13 (9 min) | ALL ABOUT METABALLS
In depth tutorial on how to properly use Metaballs and Meta Elements in Blender. Also goes over how to mirror them as well.
NITROX3D-14 (7:20 min) | ALL ABOUT RESHERS
An overview of both commercial and built-in Remeshers for Blender 2.81+.
NITROX3D-15 (10 min) | SHELLING THE ROBOT
Modifier techniques which help in creating the Meta Bot shell and recesses.
NITROX3D-16 (9 min) | HANDLE AND THE CLAW
More meta-techniques for creating the handle and KIT OPS tools for creating the robotic arm.
NITROX3D-17 (10 min) | STAND AND THE DECALS
Learn how to add decals to non UV-mapped surfaces and wrap them correctly on the geometry. Also, more meta-techniques on creating the stand.
NITROX3D-18 (4:40 min) | ROBOT CLAW AND DECALS
Add materials and decals to the Meta Bot robot arm.
NITROX3D-19 (4:15 min) | CREATE ALL MESHES
Learn how to consolidate the model into all mesh data.
NITROX3D-20 (14 min) | CREATE FINAL RENDER
Set up the final scene, lighting and adjust EEVEE render parameters. Add lens glare and final color toning as post effects in the compositor.
Post Comment